


I'm Trying Krita for the First Time
First Impression and Art Process

What's up!
Yes, I'm posting these newsletters bi-weekly now days. Easier on me, and better for you, I hope 😊
I finally tested out Krita for the first time. It was about time! I had heard so many good things about it, so I figured, why not check it out?
Did you know that “Krita” means crayons in Swedish? Well, now you do. 😁
So, what exactly is Krita? It’s an open-source drawing software, meaning it’s free! And apparently, they’re celebrating 25 years. That’s impressive.
I had considered trying Krita a few years ago, but honestly, I got tired of the whole “learning a new software” process, so I never did. This time, though, things were different. I wanted something to replace Rebelle. I had been thinking about Clip Studio, but since Krita is free, I figured, why not give it a shot?
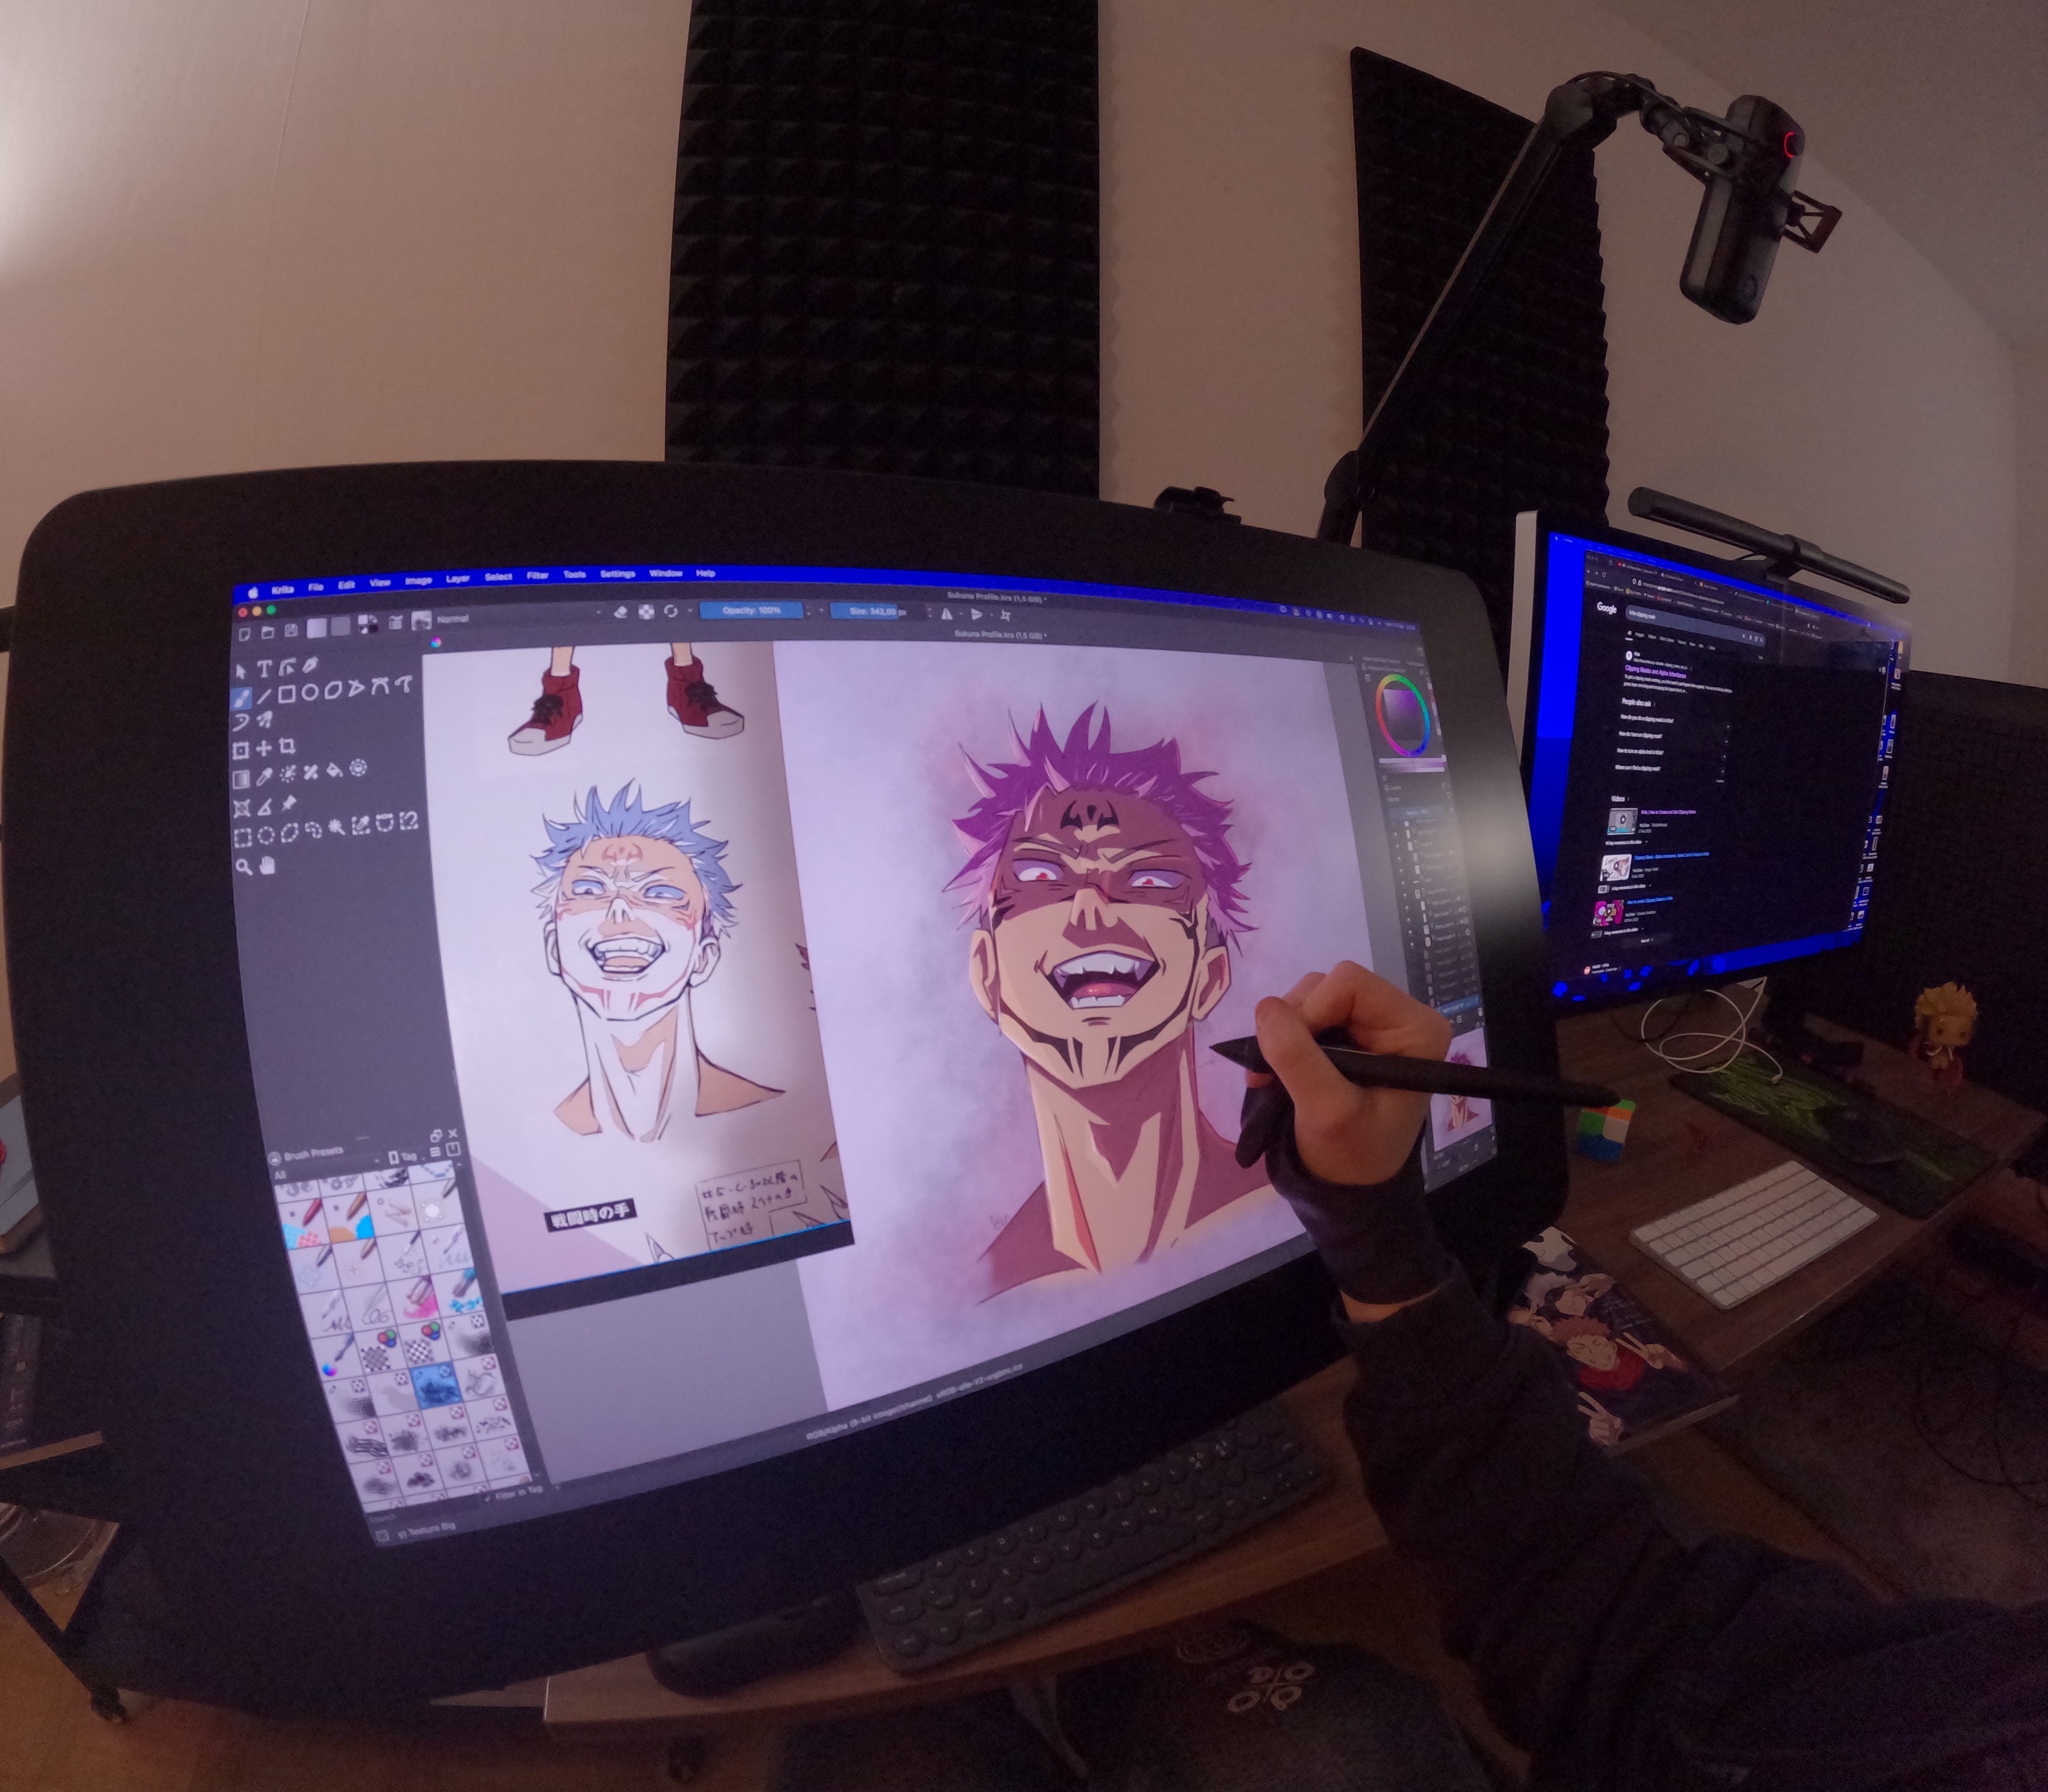
The first step was setting up the interface to have everything in the right place. The second challenge was getting it to work with my TourBox. And that? That was a hassle. The shortcuts weren’t the same as in many other programs I’ve used, not even R for rotate! WHAT?!
I had to search for some things, change others, and tweak settings to make it work. But in the end, I got it done.
One thing that really annoyed me was the eraser tool. In every other software I’ve used, I can press E for eraser and B to go back to brushes, smooth workflow. But not here! In Krita, if you want to switch back to the brush, you have to press E again. Super annoying! It ruined my workflow completely. If anyone knows how to change that, please tell me!
Another thing, Krita’s clipping mask doesn’t work the same way as other programs. For my first drawing, I didn’t bother searching for it, but for my second attempt, I did. Turns out it works by creating groups, which is actually pretty handy once you get the hang of it.
Then there was deselecting a selection. In most programs, it’s Cmd + D. But in Krita? It was something completely different. I don’t even remember what it was! 🤣
When something doesn’t work the way other programs do, my ADHD & ASD brain kind of explodes a little. I get frustrated and, 99% of the time, just give up and never touch it again.
I didn’t test too many brushes or even check if I could smudge. Part of me doesn’t want to keep using it, while another part wants to give it an honest try.
That said, drawing with it felt great, especially using my Cintiq Pro and TourBox. So, I can understand why so many people love Krita. The problem is, when things don’t work the way I expect them to, I just give up. Most programs function similarly, making it easy to switch between them, except Krita has its quirks.
If I work in greyscale, I can use a gradient map to color just the layer I want. This is how it should work, unlike Rebelle 7, which doesn’t do this. However, it did require a lot of tweaking.
Oh, and importing Photoshop brushes? I read that Krita supports it. When I tried, the file wasn’t greyed out (like Procreate or Clip Studio files), so I thought it would work. But nope! It never actually imported. The file ended up in the Krita folder, but when I highlighted it, nothing happened. The new window didn’t even have an “OK” button. If I double-clicked it, Affinity Publisher opened instead. So, I gave up on that too. Maybe it just doesn’t work after all?
For my first artwork, I recorded the process because I wanted to make a video about it. But here we are, making a written post instead. I’d rather have people here than on YouTube. 😊
And testing just one artwork isn’t fair to the program, especially since everything was new to me. So, I did another one, Sukuna!
For that second artwork, I took a different approach, and it worked well. So, yeah, I might actually stick with Krita after all. Clip Studio just released Version 4, but I don’t feel like paying for it. I already have Rebelle 7, Affinity, and Procreate. Do I really need more drawing software?
The more I use Krita, the more I like it. I still don’t know if it has a smudge tool because I can’t find an icon for it.
Speaking of icons, if you hover over them in other programs, they usually tell you what they do. But not in Krita! It tells you what’s in a layer, but not what the icons mean. So, I have no idea what half of them do. Haha! 🤪
Creating the Artwork
The artwork I want to show you is Sukuna from Jujutsu Kaisen. I recently got the art book for Season 1, and one of the heads in there just called me to do my own spin on it, so I did!
1. Sketch: I started with a very loose sketch before making the line art. I don’t do multiple sketch stages anymore. Back in the day, I’d have **10 layers** for this stage alone

2. Greyscale: I’m working more in greyscale these days because colors and I don’t get along anymore, especially not rendering light. Doing it all in greyscale helps me see if it’s too much or not.
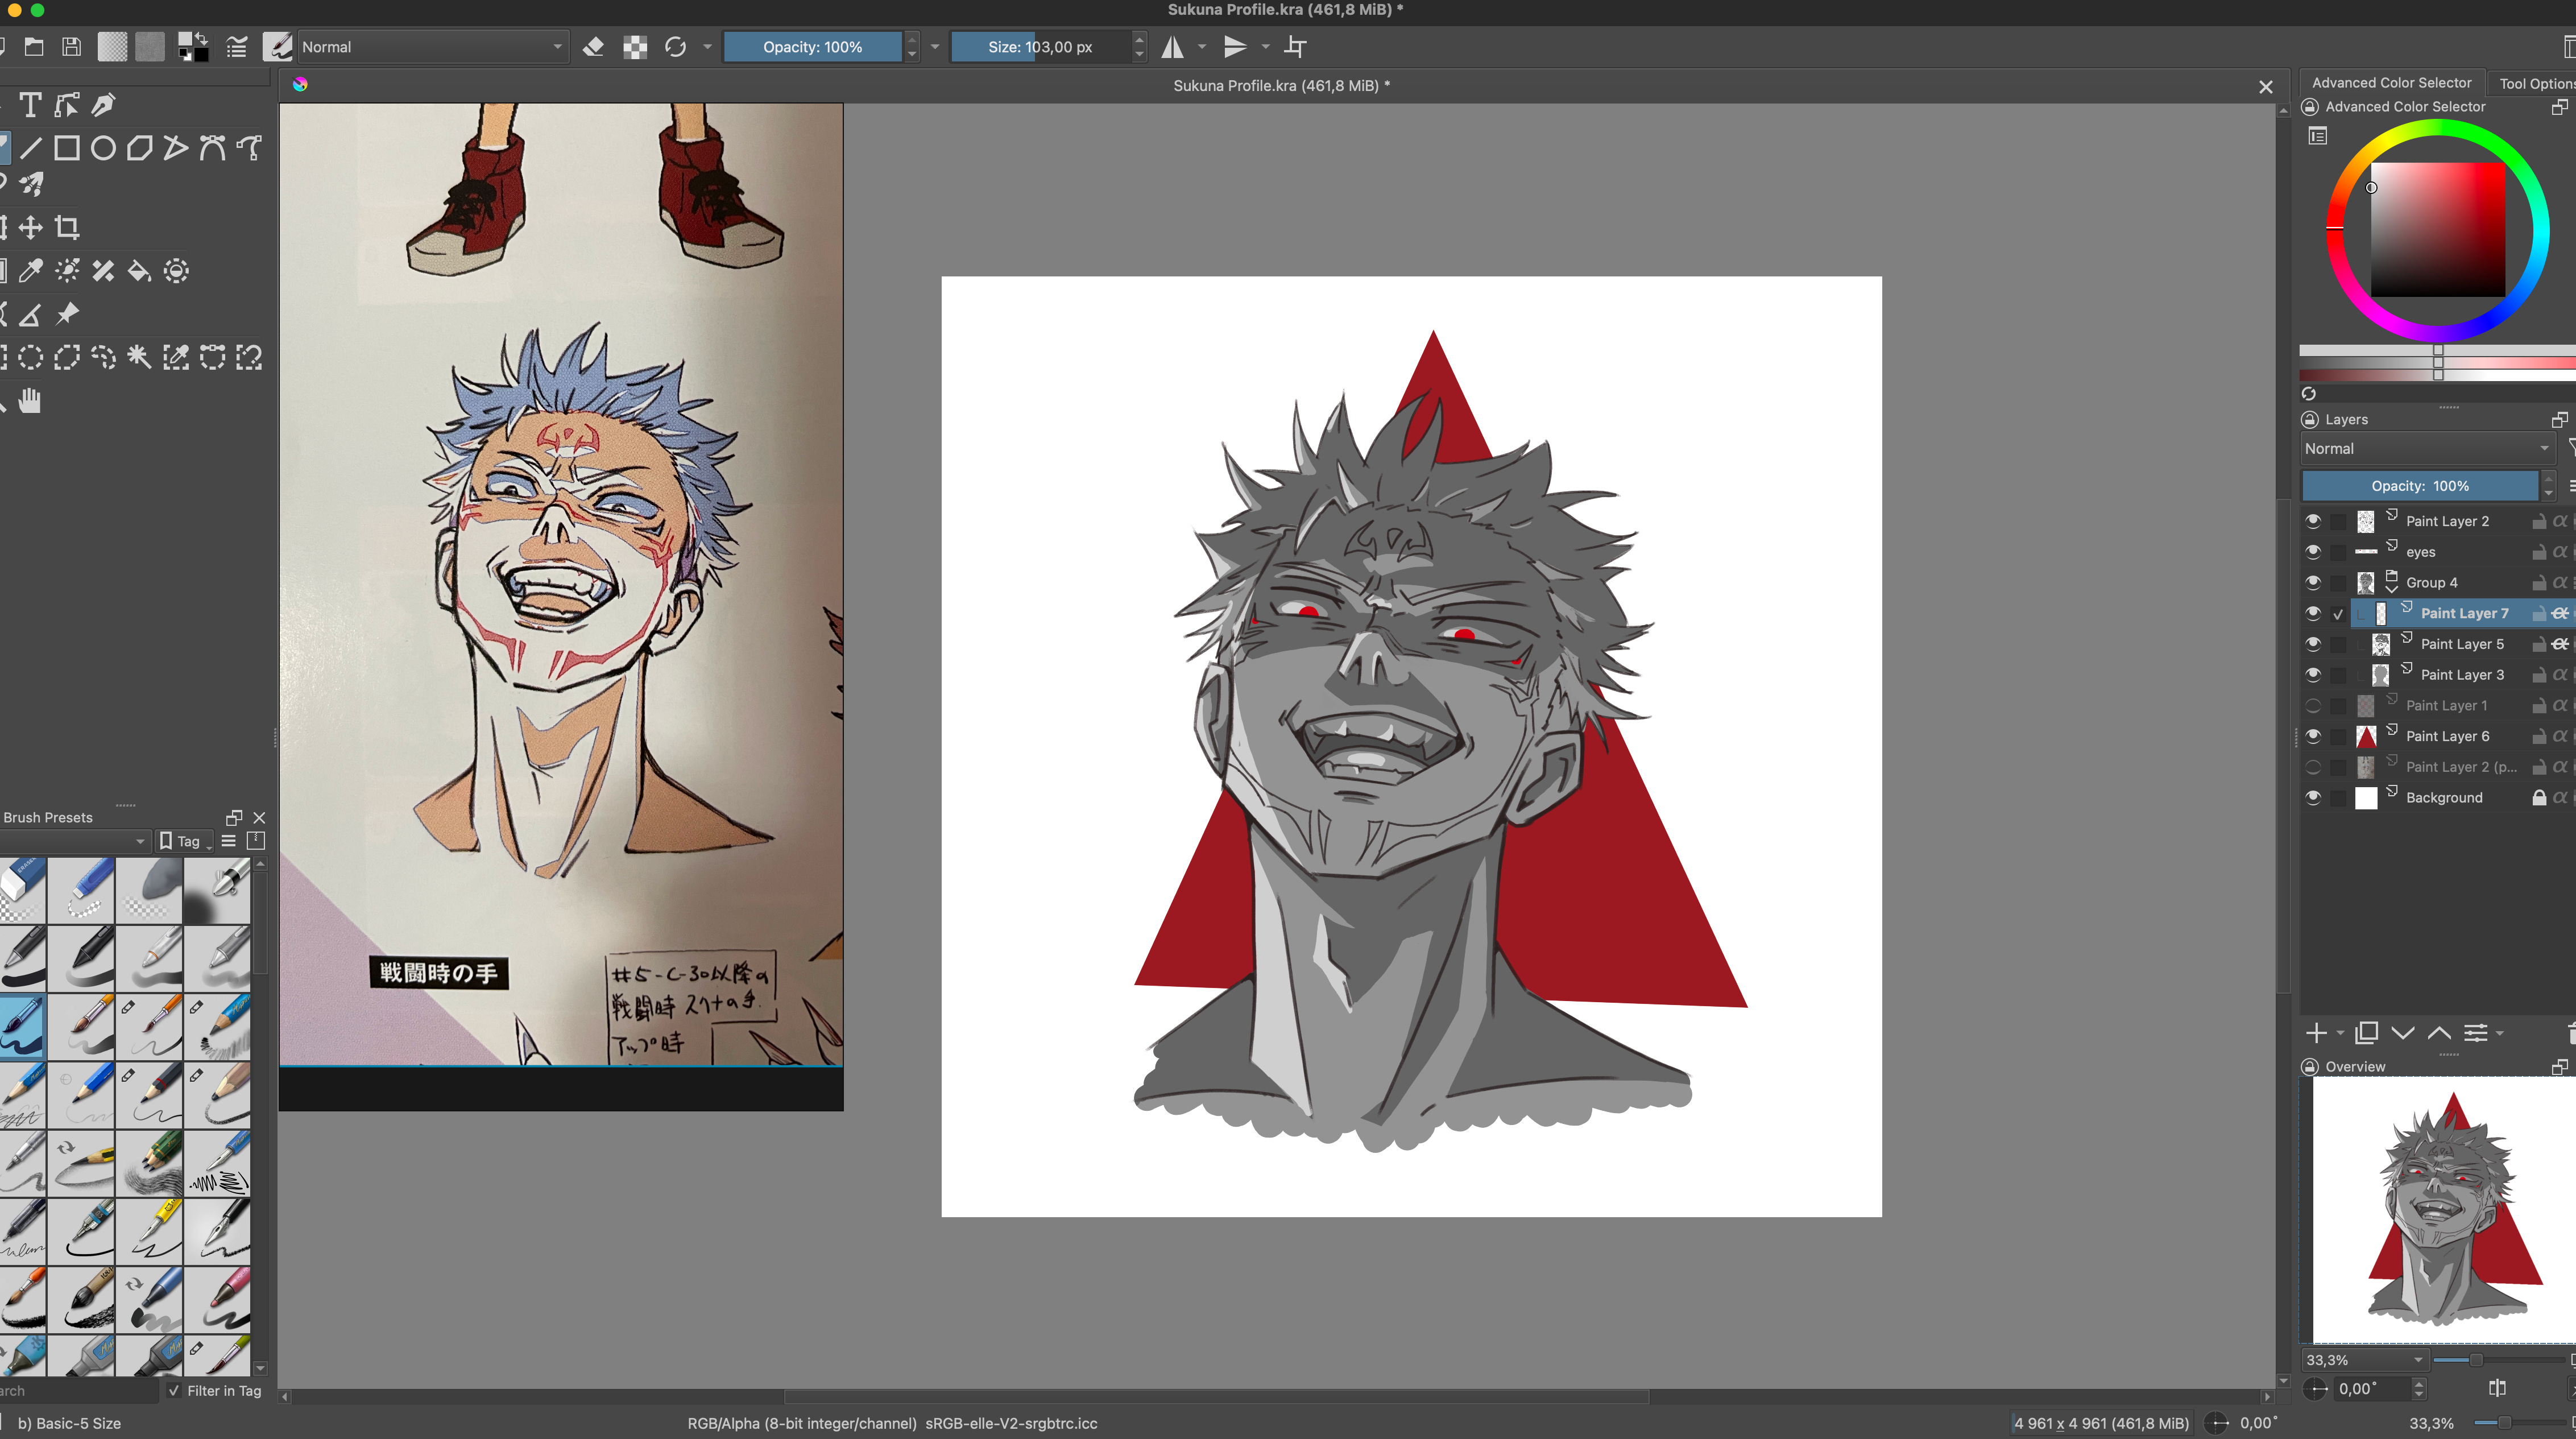
3. Coloring: Once the greyscale is done, I duplicate it just in case. Then, I alpha lock the layer and start adding colors. I do the same for shadow and light layers, using Multiply for shadows and Overlay for light. Honestly, I wish I had done this years ago! I don’t add color on top of greyscale unless I use a Gradient Map. I suck at that technique, so just recoloring the layers works better for me.
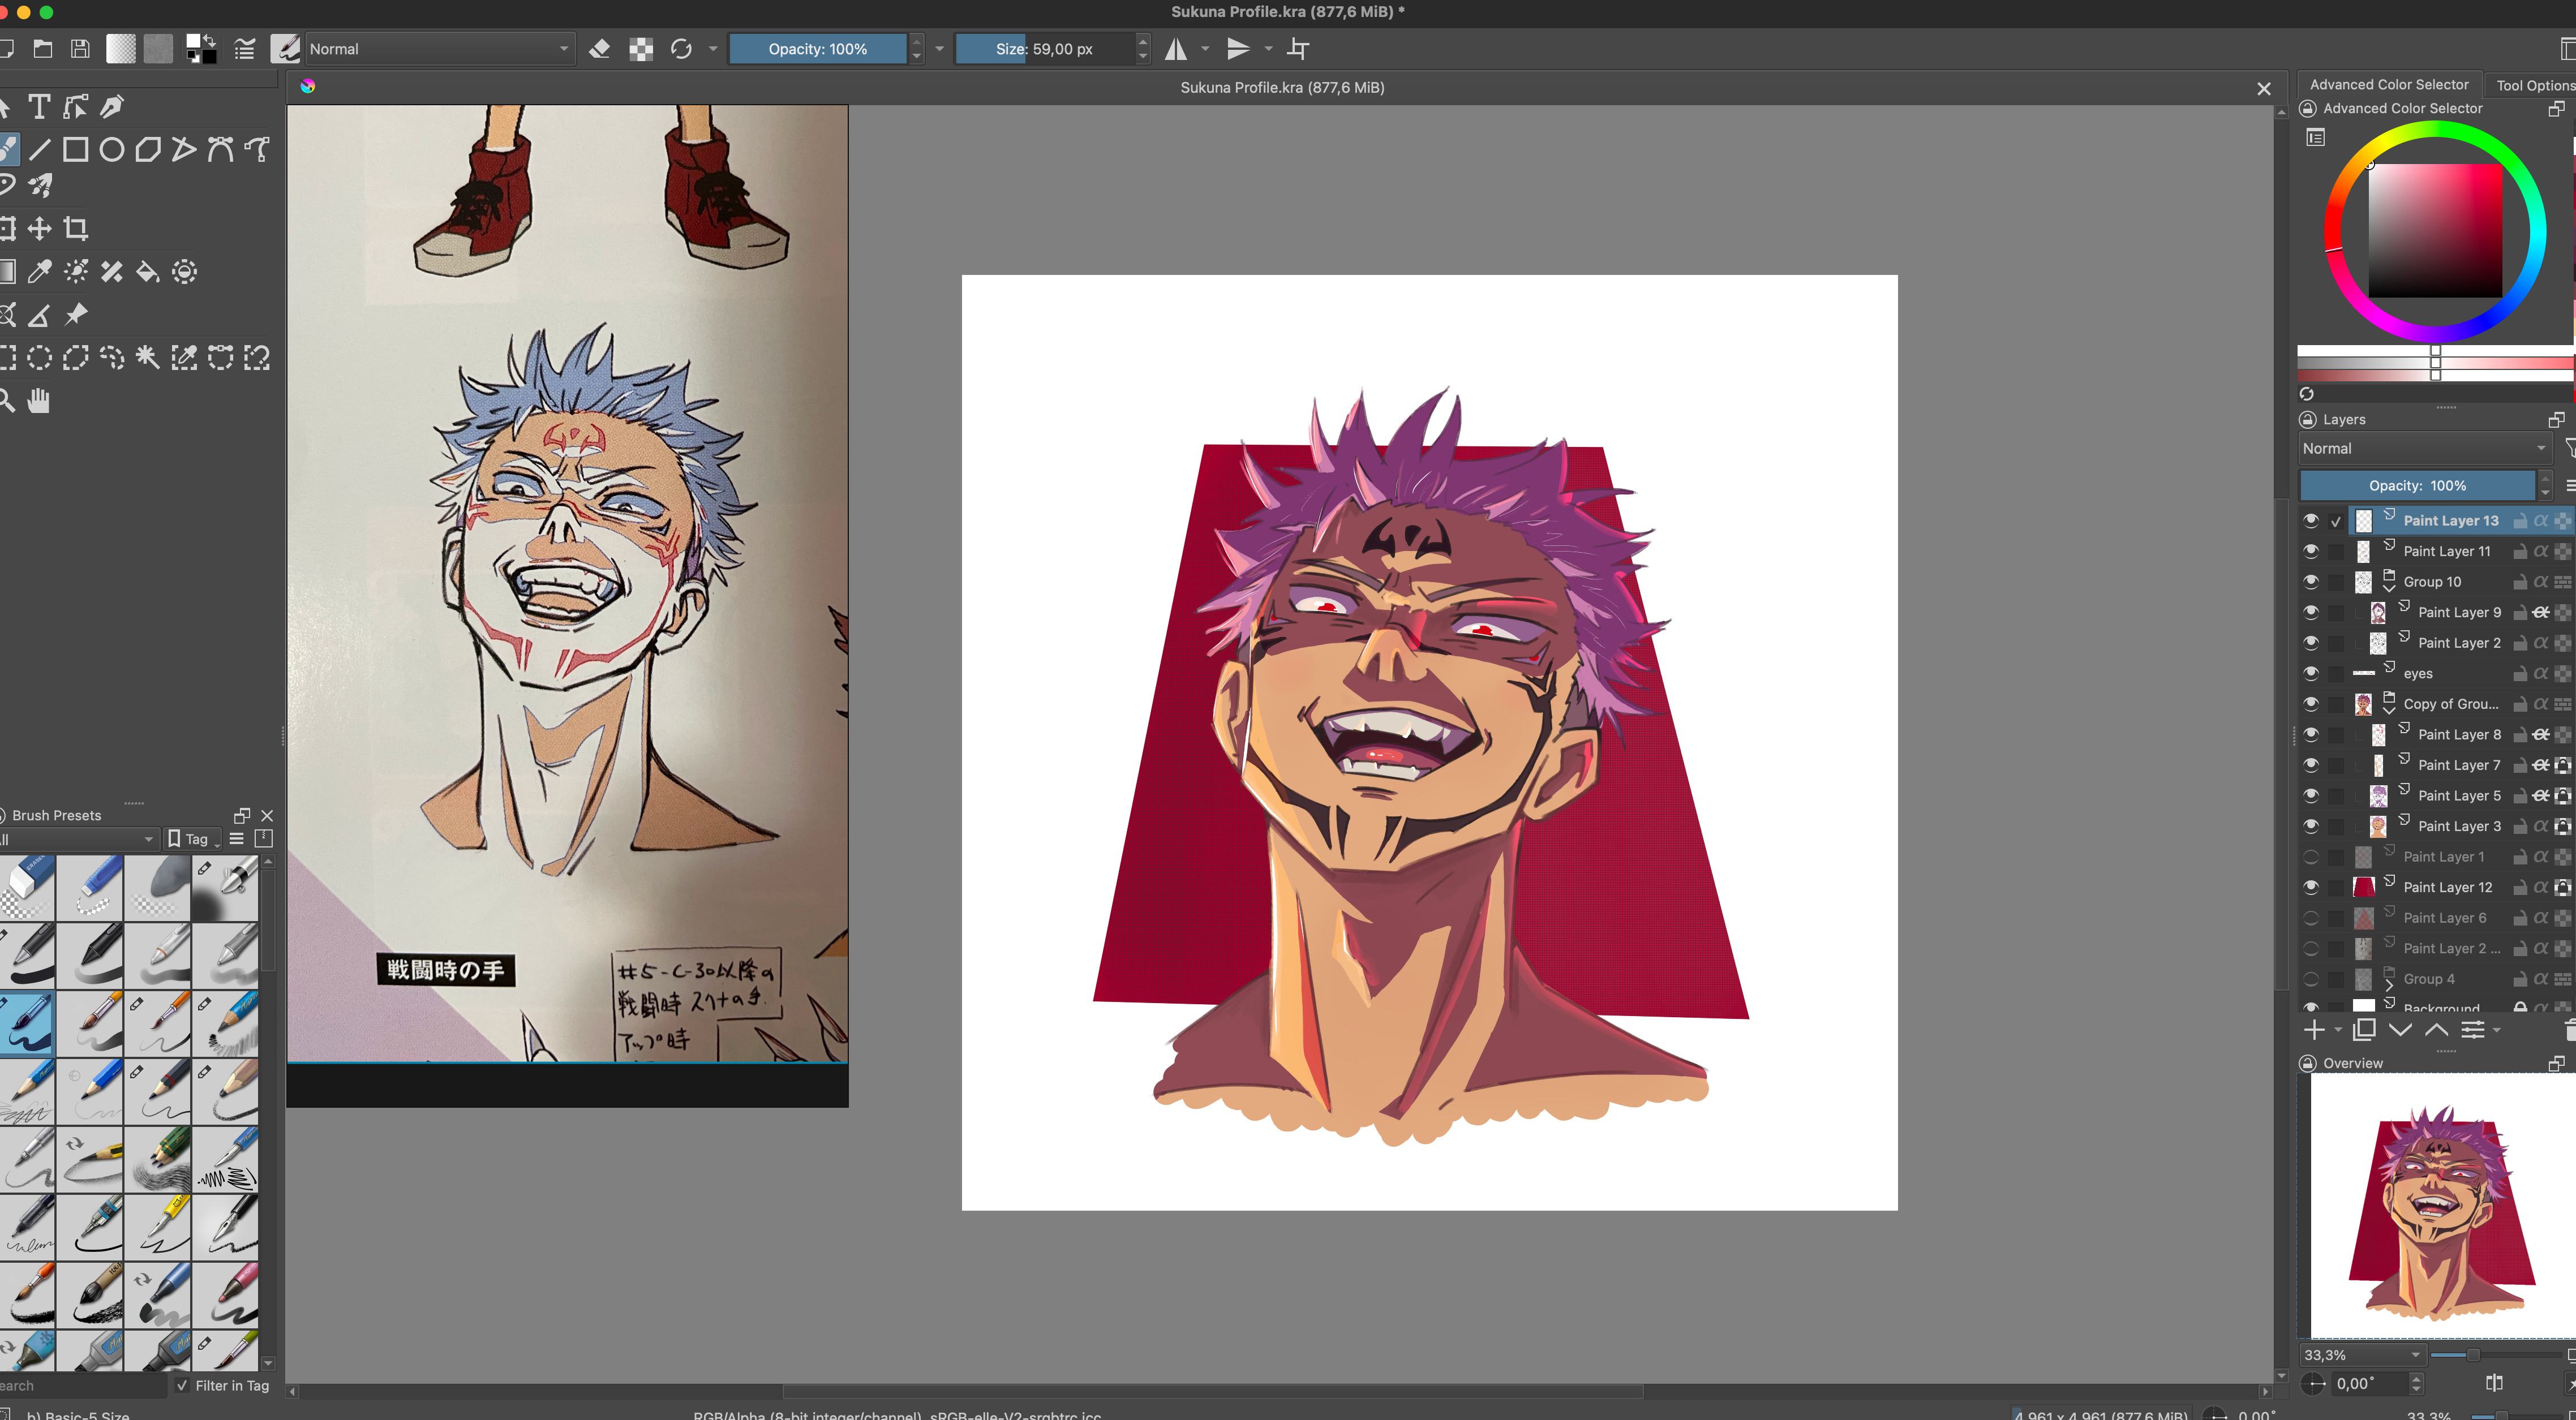
4. Final Rendering: Last step, adding highlights, reflections, and refining shadows. I also color the lines based on the shadows to make everything blend better. I tweak things until I’m happy with it.

And YES, Krita is a great program, and it’s free! So, if you haven’t tried it yet, give it a shot! 😁
Krita is available on Mac, Windows & Linux.
🌱 Little Doodles
I have started to sketch with a ballpoint pen. Will probably write more about this journey along the way


🌱 What to Read Next?

🌱 What to Listen on next?

Thank you so much for your generosity and support!